
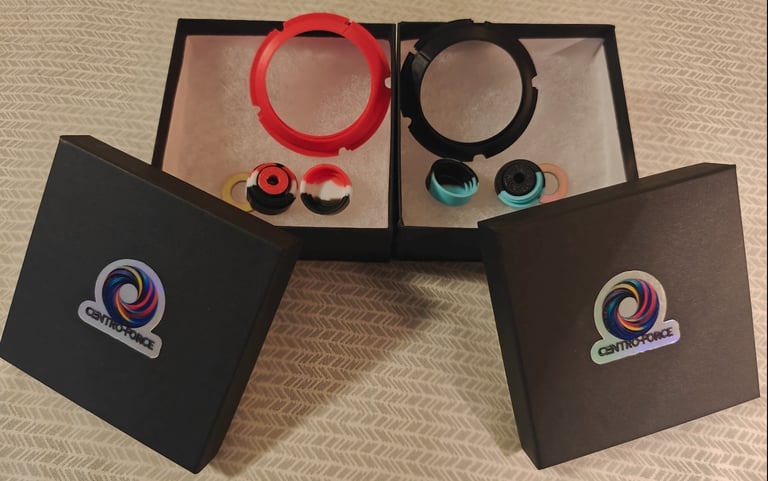
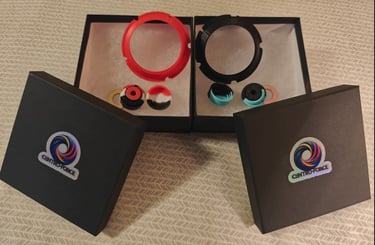
Kit involes
Two Sections:
SECTION ONE,
Front Mod piece Installation:
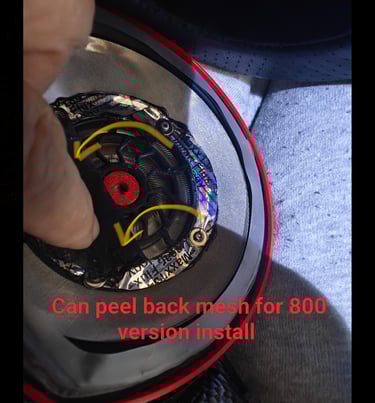
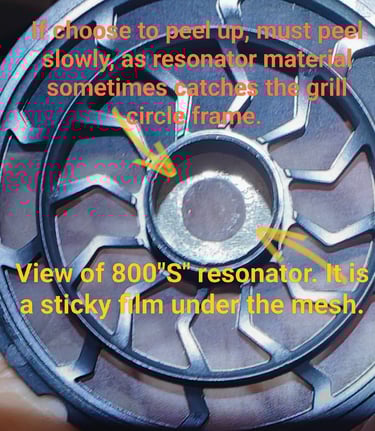
BUT...On the HD800S, there is a "sticky film" at the center, under the mesh...
So it is much more recommended (whenever possible) to do the more skilled & professional installation, that does not alter the mesh on the grill..
Professional Installation:
**Remove the 4 screws with screwdriver bit # T7 (not included). It's important to have the correct bit size, so to not strip the screws. Then remove metal retainer ring.
Driver is now exposed and ready for grill removal.
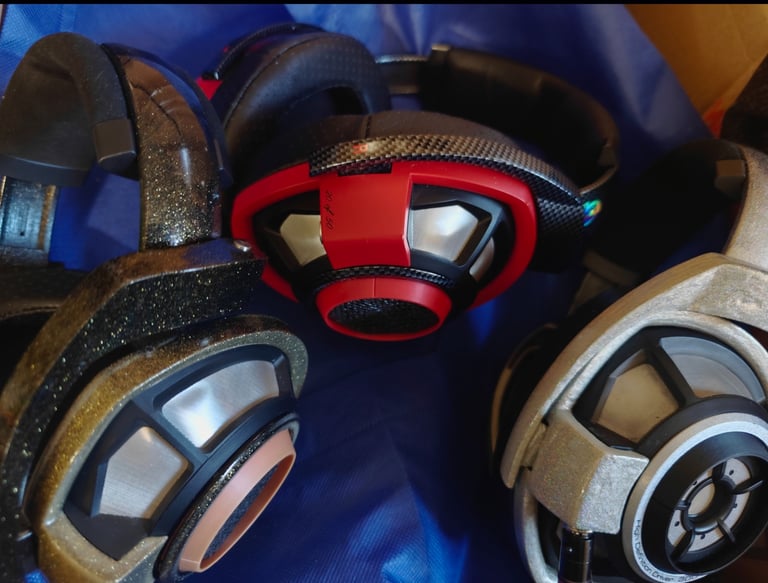
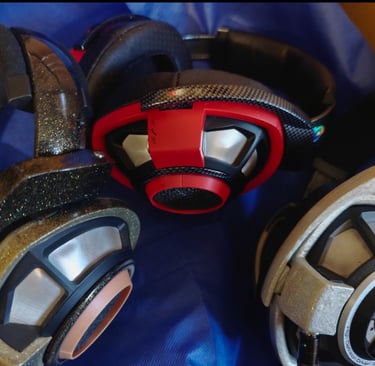
The Easy way (non professional), is to slowly/gently peel up mesh to insert the front mod piece... Top piece can be ordered in various colors (red below).
This is actually the "top part" of the 800S “resonator". It is a tacky material.
IF deciding to pull up the mesh for installing on the 800S, Precaution MUST be taken to not damage this, as sometimes it can stick a bit to the grill, so must peel sloowwly.

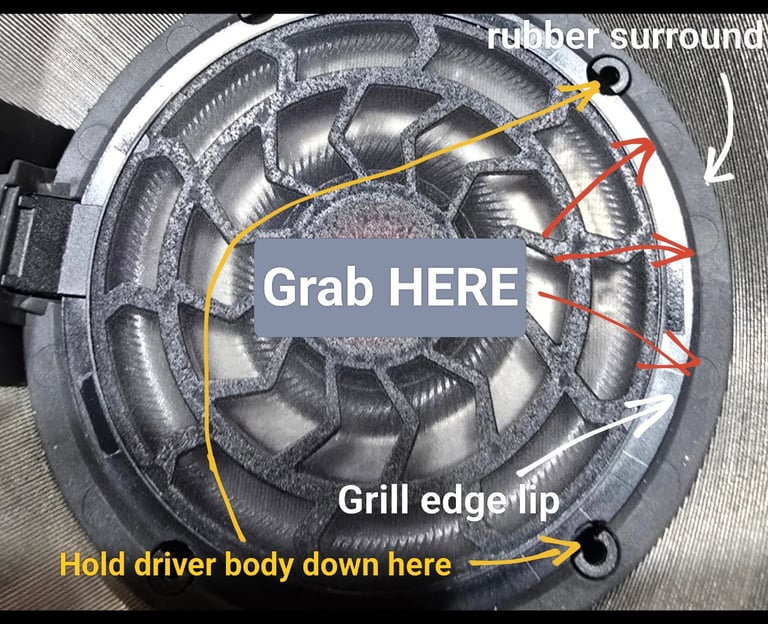
Now we must carefully lift the grill from the driver. Many have done this before. To do this, the driver must be held down at same time we lift, because it is still soldered onto plug.
You can hold the driver down by the screw hole. Try with a plastic tool like a Q-tip, into the screw hole, to hold the driver down. Start prying up the grill by its edge lip, at opposite side from the plug side. You must have enough fingernails to safely catch the edge, so you are only using your fingers to gently lift and grab, for safety.
Set the headphones down carefully, avoiding touching the exposed driver, especially the voicecoil area by the plug side.
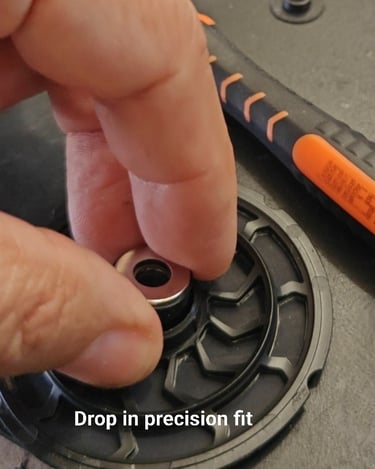
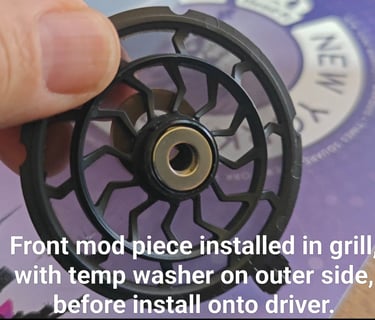
We will now install the Frontal mod piece onto THE GRILL...
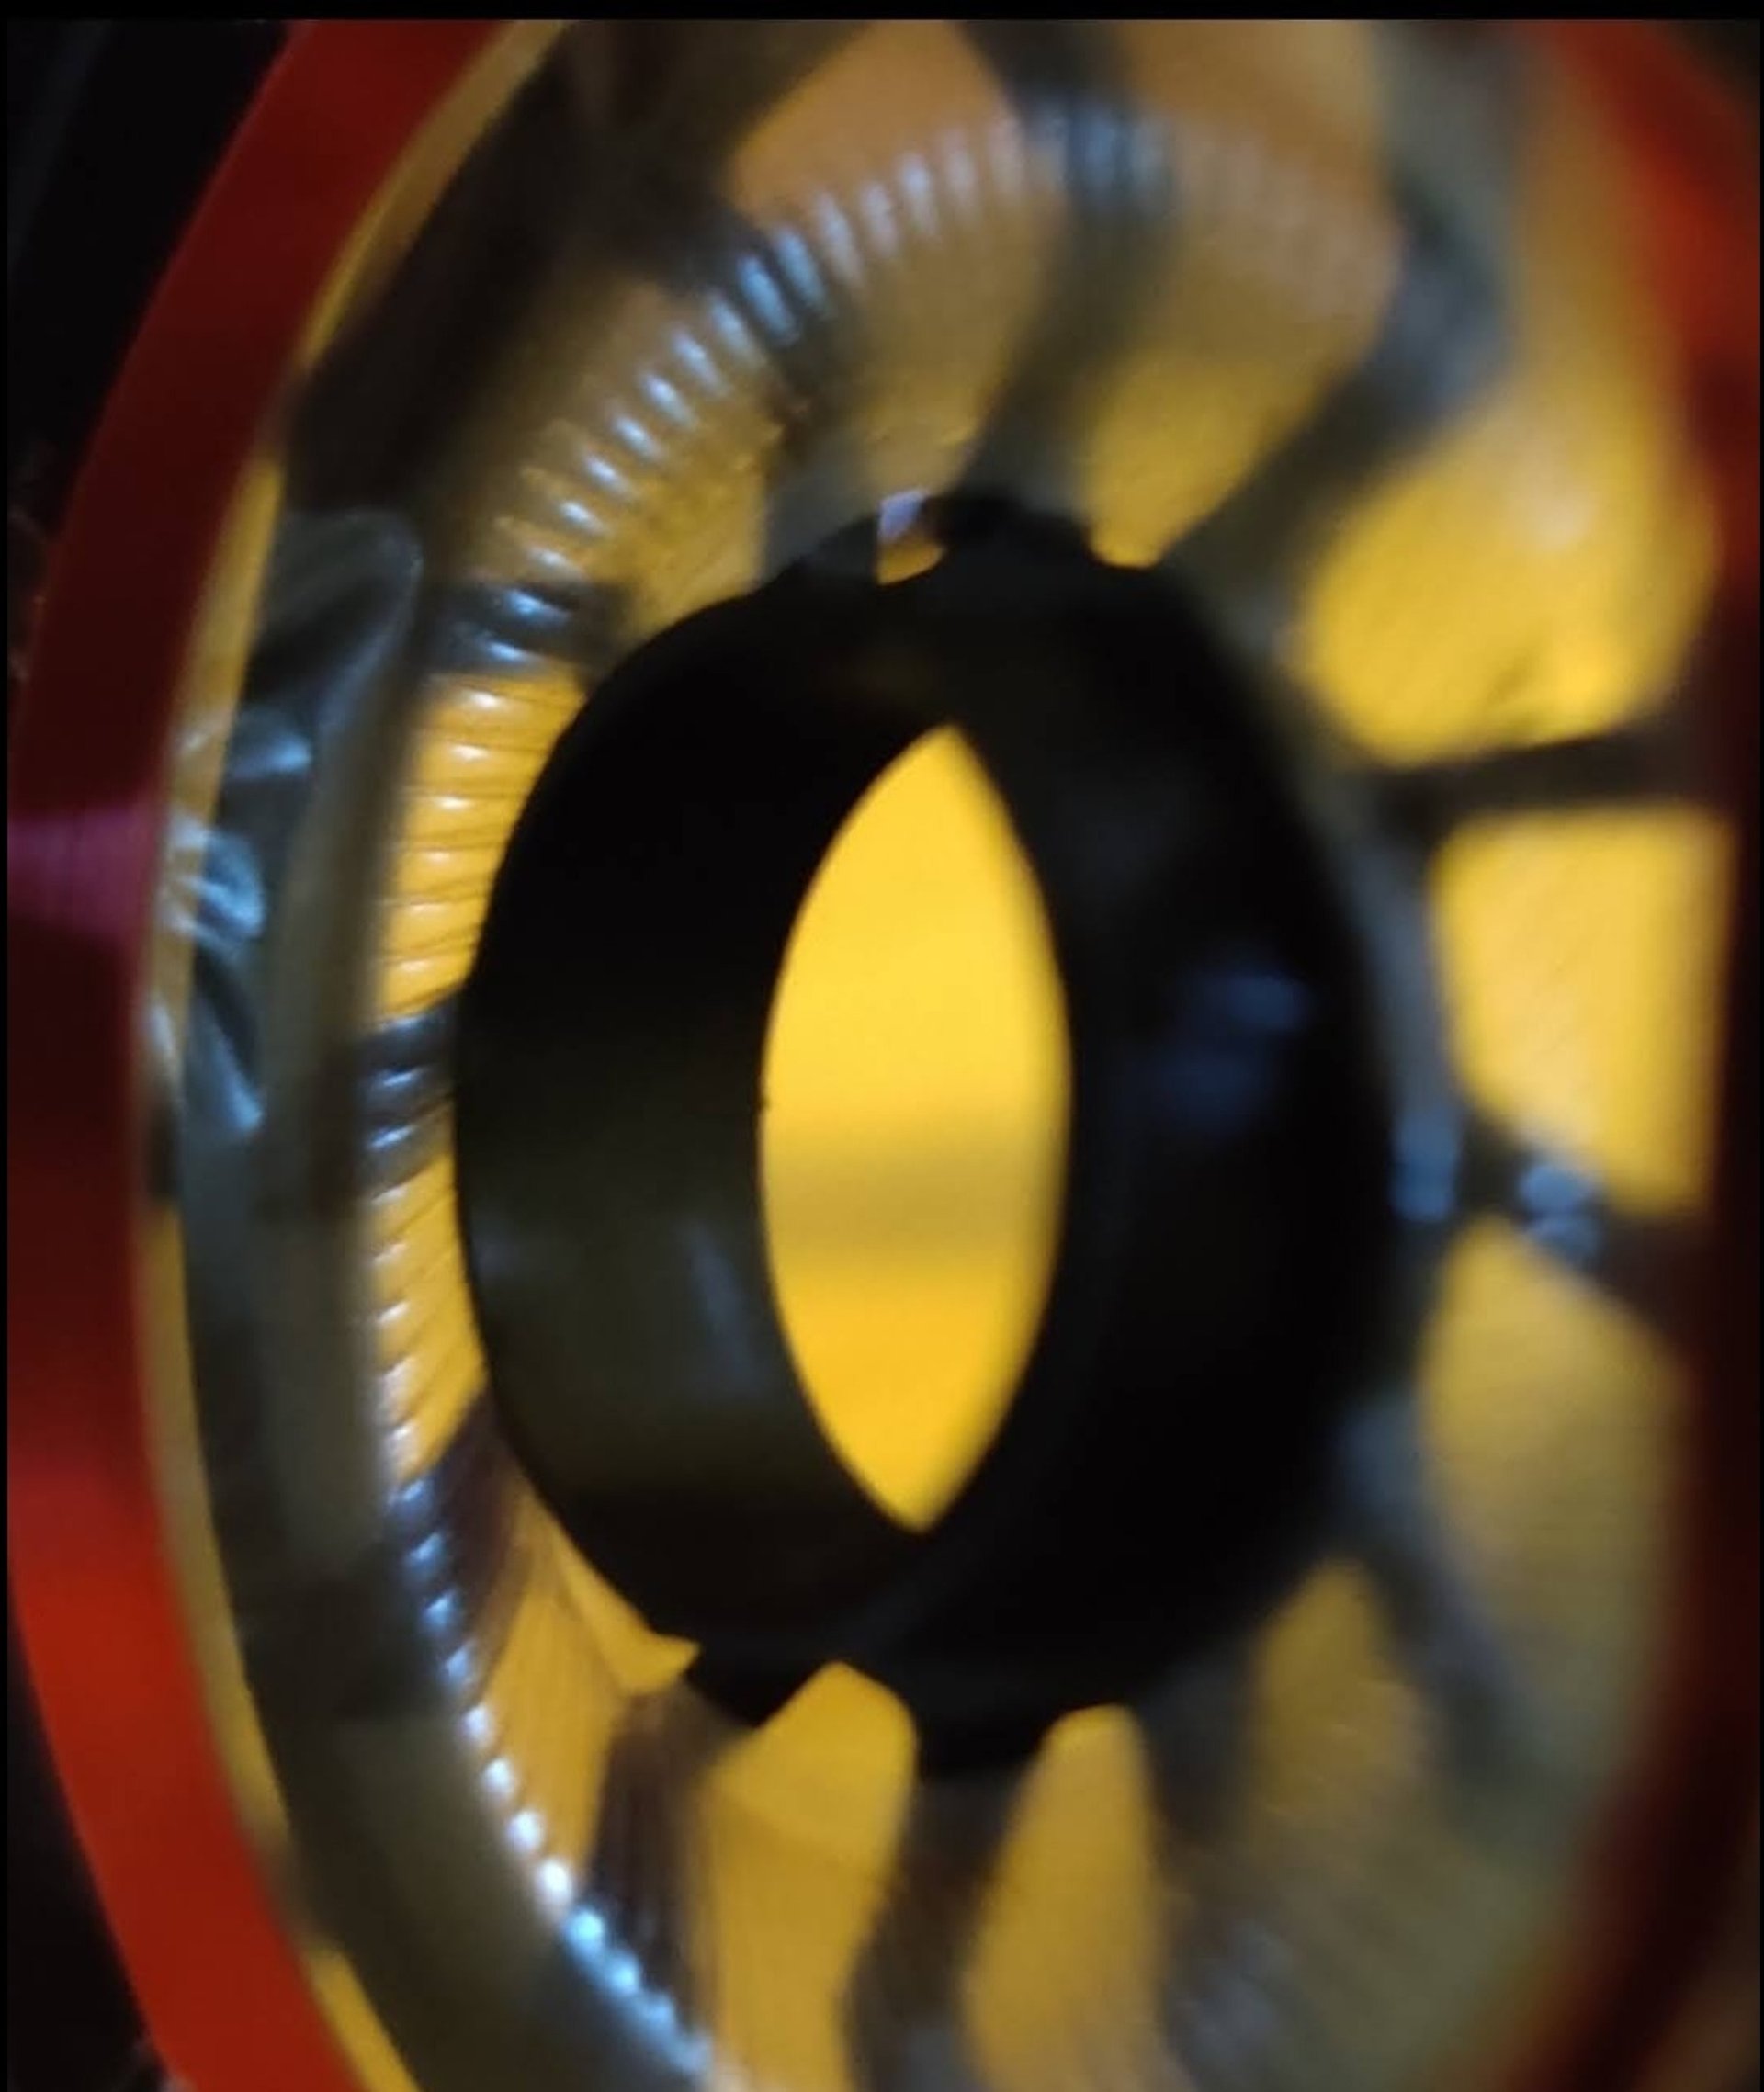
Push the piece with plastic side first, into the center of the grill, letting it stick out a tiny bit, than flush. Do not press this all way into the grill flush, as this piece will actually be resting inside bottom of driver.
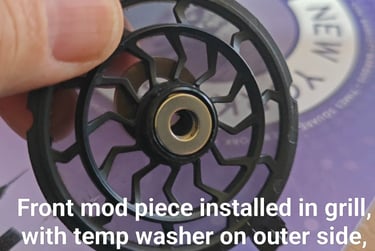
Once positioned in grill, we place a "temporary washer" (supplied) onto the other (outer/top) side of the grill.

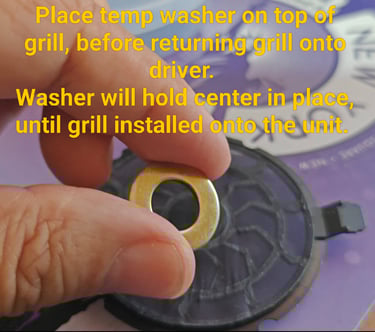
This is done to magnetically hold and temporarily keep the piece in the grill during reinstall of the grill onto driver (next).
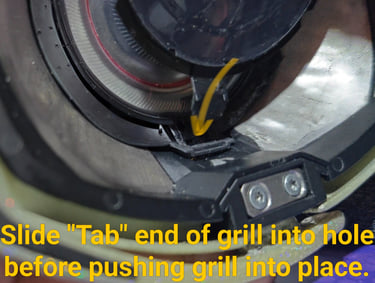
To reinstall grill, we carefully angle in the grill's tab edge first, into the plug side hole. The slowly lower the rest of the grill, while watching/aligning it with the screw holes, as we press it back into place..

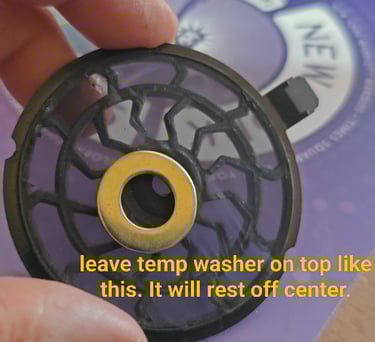
Once Grill is fully seated in place, it is installed, so we can now remove the "Temp washer" by holding down the grill first.
The center mod piece will now be attracted to stay in the hole. Front Section is done, but screws are not in, so careful in handling unit for next step.
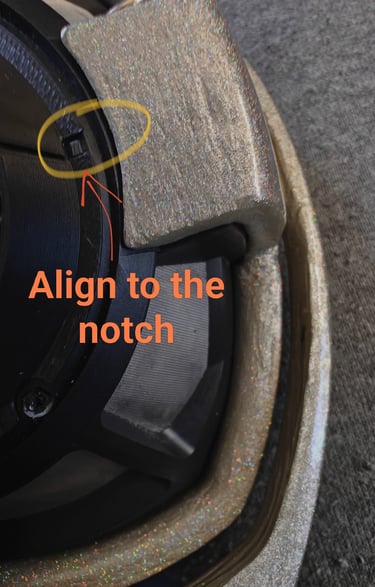
Section 2, Rear mod Install:

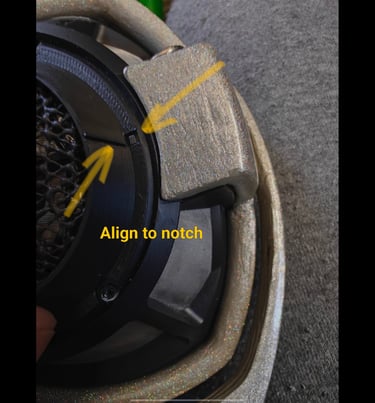
Easy Part. Just wiggle the back plastic ring off. Notice the rear metal grill is aligned with a notch at the frame alignment bump.. Remove the metal grill and replace with the new plastic mod piece, using the notch on the piece to same alignment bump on the frame.
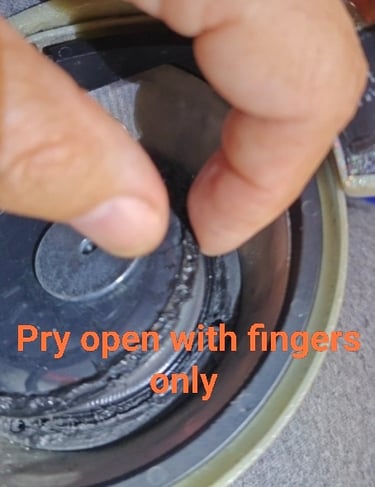
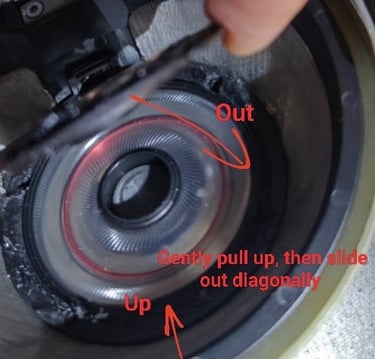
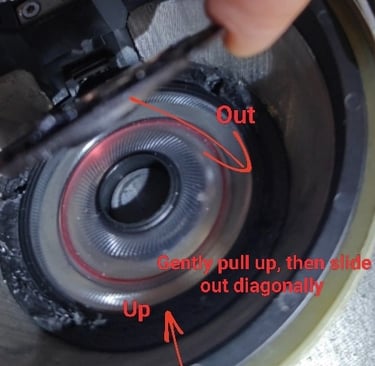
This image is actually closing it, but to show you use fingers for lifting as well. Please excuse the messy edges, as this unit was basically opened & experimented on many times without an issue.
Once the grill is lifted up at that side by about 45 degrees, then you can slide it out sideways, as the grill has a lip at socket side to slide out.
Finish the install, by replacing the screws with the front metal retaining ring, all back on...
Done!
Congratulations, if all went well, you have just completed installation of the single greatest modification ever made for this headphone! Enjoy!
Also, if you have blundered and made any hasty mistakes to somehow damage your unit, still no worries, as replacement drivers are available from Sennheiser parts sellers. just email us for info.
In reality (and historically) we dont see there being an issue with competence, as this driver is so robust and strong.

Attention, Disclaimer:
Before attempting, you are acknowledging, accepting, and participating beforehand, of the risks involved, due to the technical proficiency required. We will not be held liable or responsible for injury, loss, or damage in attempting the kit installation. This is why we recommend having some technical proficiency. That legal statement being stated, onto the instructions.
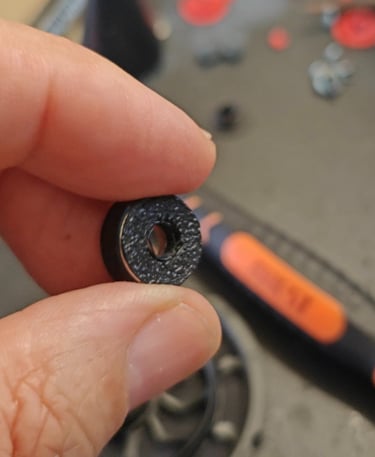
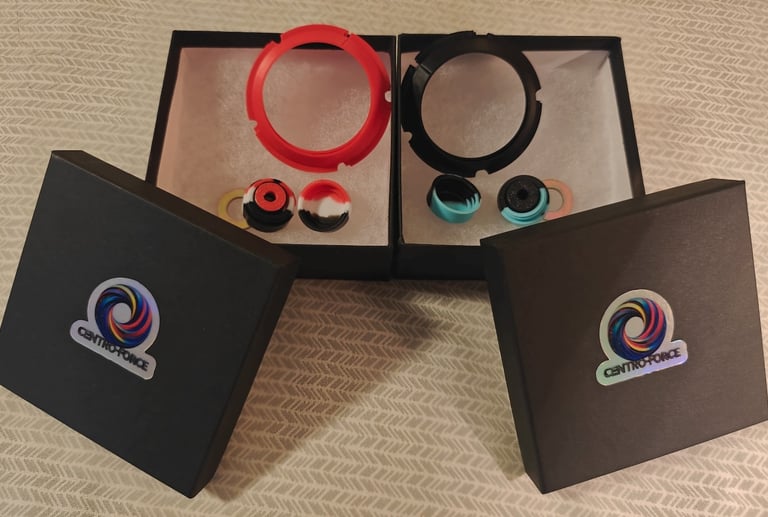
The kit ships with the front pieces in a silicone case, using rubber washers to separate, so rubbers are not part of the install.
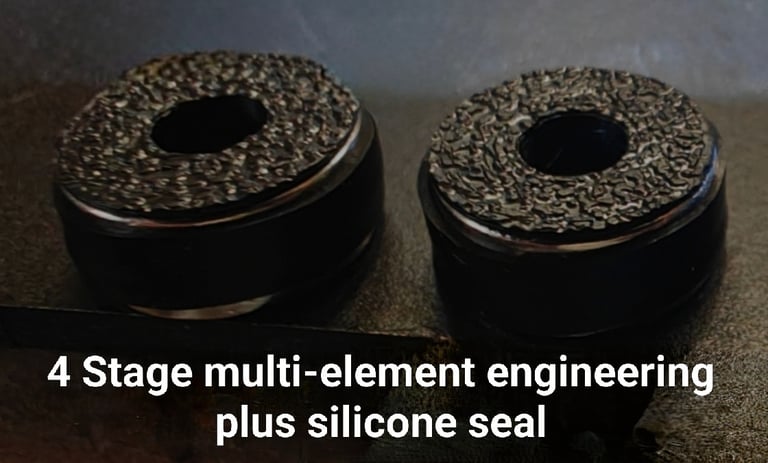
The front Mod is comprised of four elements engineered into one piece.
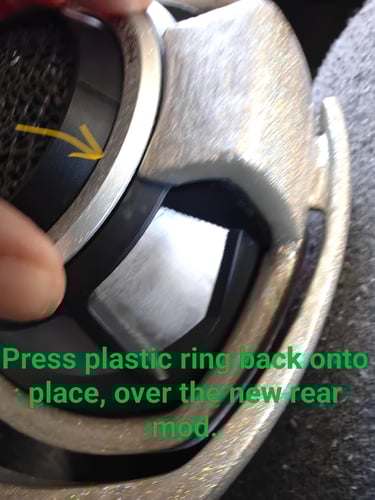
Now gently press the plastic ring back on with one hand, while holding the driver in place (at the inside) with your other hand, so the driver wont get moved while doing this.
For experienced modders, installers, and tinkerers, we offer our kits, (with discount pricing for bulk kit orders).
Read this page over a few times to gain familiarity with the procedure before attempting.
Kits were designed for simplest installation possible. What's primarily needed is a slow and steady hand.
Kit Links will be on "Home tab" page.
For a very limited period, we will also offer to install the kit for you, based on time available, so you must email an inquiry for that custom job.

KIT Install:
Video install in QR code:


Contact for further info
Contact
whitigir@yahoo.com
ABOUT US:
The Centro-Force name came from our teamwork design. It evolved from the improved center driving forces that enabled a more evolved extension to the rear. AKa, "Centro Force". So our name has a meaning attached to the foundations of this Mod.
We are Enthusiasts and listening to Music is our hobby, chasing what we love. Seeking a "reference" headphone that can "do it all" to reproduce everything in the Recording, as Natural and real as possible, without lacking bass or Musicality.
In our Opinion, a true "Reference" should be as Realistic & Natural as possible. From all our experiences with so many different headphones, Desktop and Portable alike, we opted for the HD800, for how Natural and Neutral it is, over all others. But the HD800/800S are now considered Ancient. We have always wished for a true successor to the 800/800S. How about an upgrade with the Dynamics of a Utopia, the staging of the 800/800S, and the detailing/resolve rivaling any TOTL IEM, for a start?... And so our quest began, and ACHIEVED!
For many years, others have tried to find ways to improve the 800/800s, but our "upgrade" work has never been accomplished before. Our work is not a "tuning mod", but a real performance upgrade. With our collaboration of being "open minded", with an "outside the box" approach, the ultimate goals of bringing the 800/800s to newer Heights were accomplished.
Finally, we arrived at Something that restores real Sub-Bass/Mid Bass, while keeping mids natural and as close to stock as possible, and finally cleaning up the high frequency issues (phase shifts, ringing & other parasitics which introduced harshness). These past issues, annoyances, and distortions that plagued the 800s were resolved (not masked like past tuning solutions), by controlling the "Upper Spectrum", extending its control all the way to 22Khz.
In the end, we have achieved a more correct Bass, natural mids, and airiness, with detailed highs giving clarity without harshness, like never before... A greater soundstage, resolution, Dynamics, and flawless Impulses Responses. No words can express enough of how fruitful the Centro-Force is from the results of our hard work. The one thing we are so sure of is that, if we enjoy it this much, so will you.